02. Simulation Setup
Simulation Setup
Similar to the last project, let us setup the simulation environment and the robot in Project 4 Workspace for our next tasks.
Navigate to Workspace by clicking the
Project Workspace
on the side bar. You might want to open it in a new window. You could use either the terminal in Classroom without GPU mode or the VNC Desktop with GPU mode to do the setup.
Setup your
catkin_ws
folder as well as the
src
folder, then we need to grab the code from last project. Again, you could do that in two ways.
Method 1:
git
If you have pushed your submission for the localization project to GitHub, go ahead and create a new repository then duplicate your code from last project to it.
git clone --bare https://github.com/exampleuser/old-repository.git

cd old-repository.git
git push --mirror https://github.com/exampleuser/new-repository.git

cd ..
rm -rf old-repository.git
_Source: https://help.github.com/articles/duplicating-a-repository/_
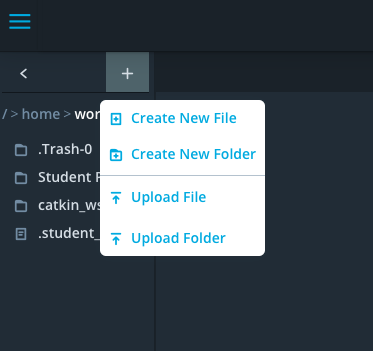
Method 2: Folder Upload
If you want to upload the package folder to the Project 4 Workspace, go to the project Workspace and click the
+
button, then select
Upload Folder
to upload your package folder!
Verify Your Simulation Setup
Do a quick
catkin_make
and source the
devel/setup.bash
script. Launch the world to verify if the system is good to go!
roslaunch <YOUR PACKAGE NAME> world.launch